Content Manager - User Guide
Read this guide to learn how to use Content Manager to browse, buy, download and install updates and extra content to your Becker PND.
To do this, you will need:
- your Becker navigation device and its USB cable
- broadband internet connection.
- operating systems installed on your computer: the latest and two earlier Windows versions are supported. (Please note that Content Manager requires a minimum display resolution of 1024*768.)
- On the website, select your device group.
- Select the map of your choice.
- Choose an update plan.
- At the checkout page, provide your details (name, email address, etc.). Please note that issued invoices cannot be modified, therefore, carefully check your information before proceeding to payment.
- If you have a voucher code, please insert it in the available box in the Order Summary. Apply the voucher by clicking the button.
- Tick the boxes to accept the Privacy policy and the Purchase Terms.
- Have a final review of the Order Summary and click Confirm Payment.
- Choose a payment method and enter the payment information.
- After your payment has been processed successfully, you will be provided with an activation code on the next screen. You will also receive a copy of your code via the email you have provided.
- Install and log in to Content Manager. (Find the guide below.)
- Navigate to "Code Redemption" screen, type your purchased code in to the code field and Click to "Redeem" button.
Installation of the Content Manager is quick and easy. After downloading the application, simply double-click the file to start the installation.
During the installation process follow the instructions on the screen and select your preferred language.
Before finishing the installation process, you can choose to start the Content Manager immediately or later.
Content Manager has an Auto Update feature, which prompts you to upgrade it at every startup if there is a newer version available. If you choose to upgrade, you will go through the same installation procedure again as described above.
After Content Manager has been installed and started, you will see the main page with detailed instructions on how to start.
The initial steps are:
1. Connect your Becker PND to your PC.
- Connect your Becker PND device to your PC with the help of the USB cable.
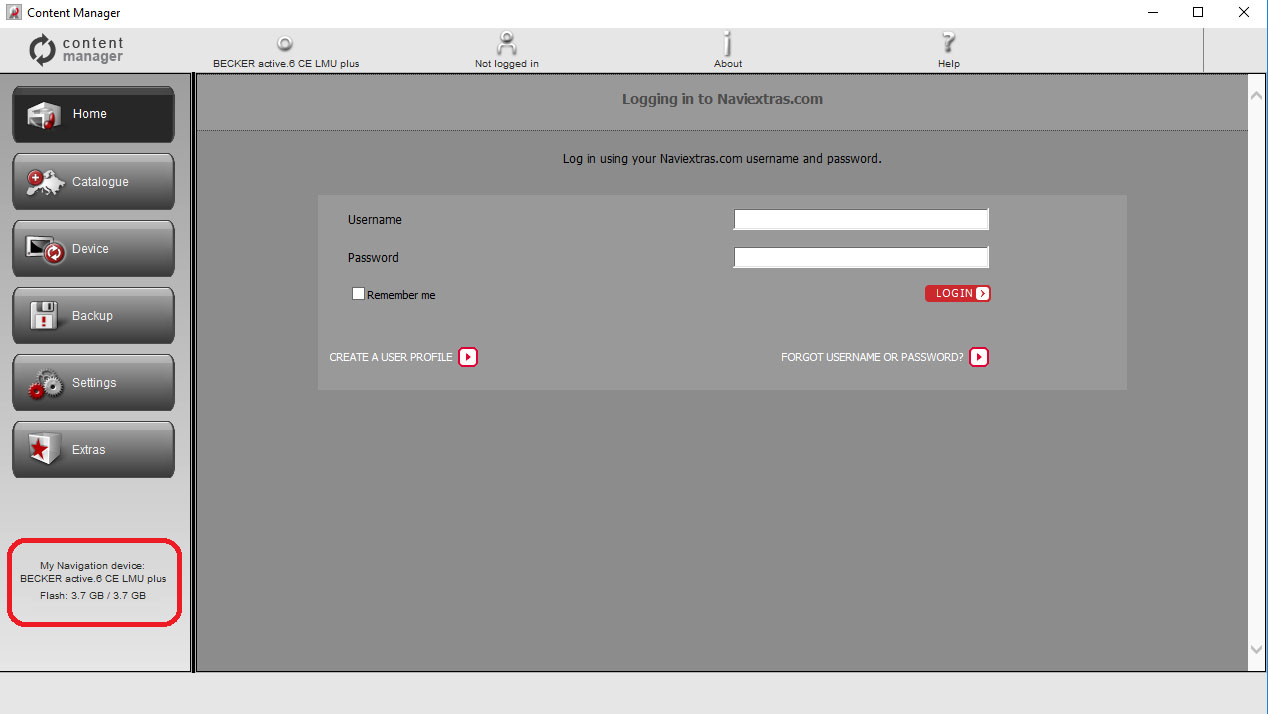
- When your device is successfully connected the device name will appear in the bottom-left corner of Content Manager window.
2. Make sure your PC is connected to the internet.
- Internet connection is required for Content Manager to verify if any update is available for download, and of course later to download it.
3. Login or register
- Please click on CREATE A USER PROFILE to create a user account and follow the instructions.
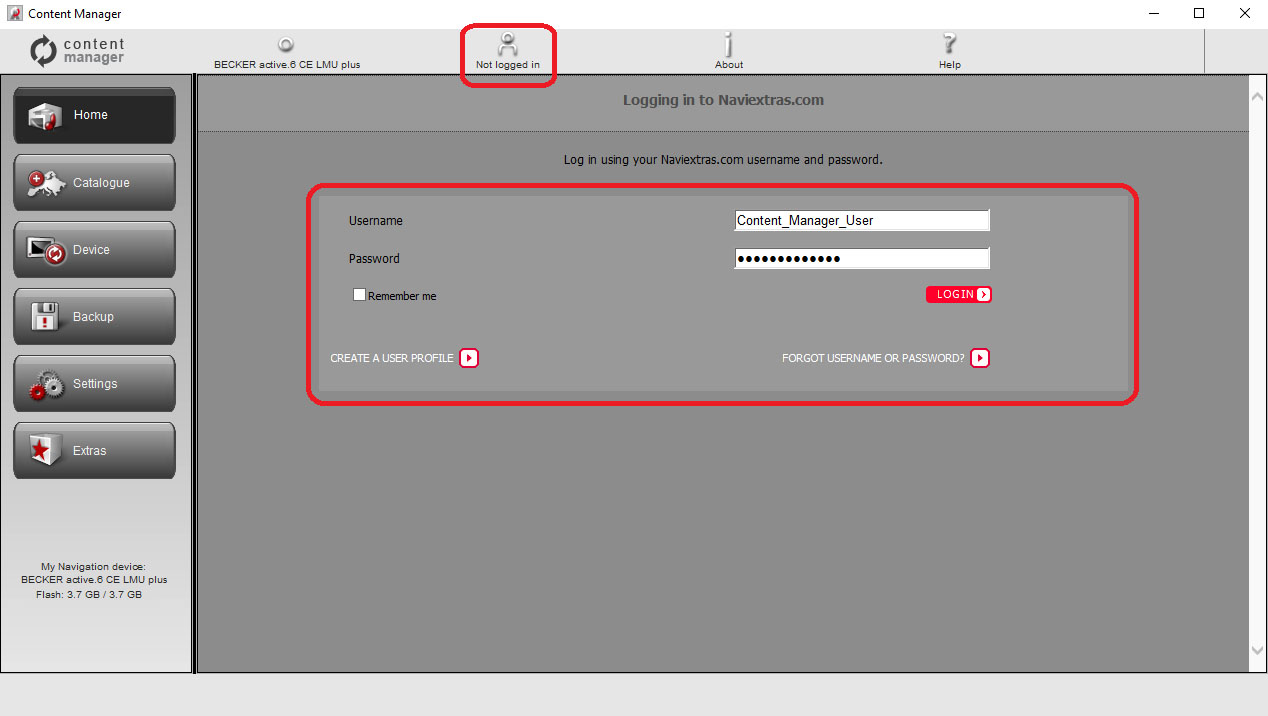
- If you already have an account, Login with your username and password.
- When you have successfully logged in, your username will be shown on the top of all Content Manager screens.
When you buy an update or any extra map the Content Manager will recognize that you have the right to download it.
After a successful login:
- Select the CODE REDEMPTION menu on the Home screen.
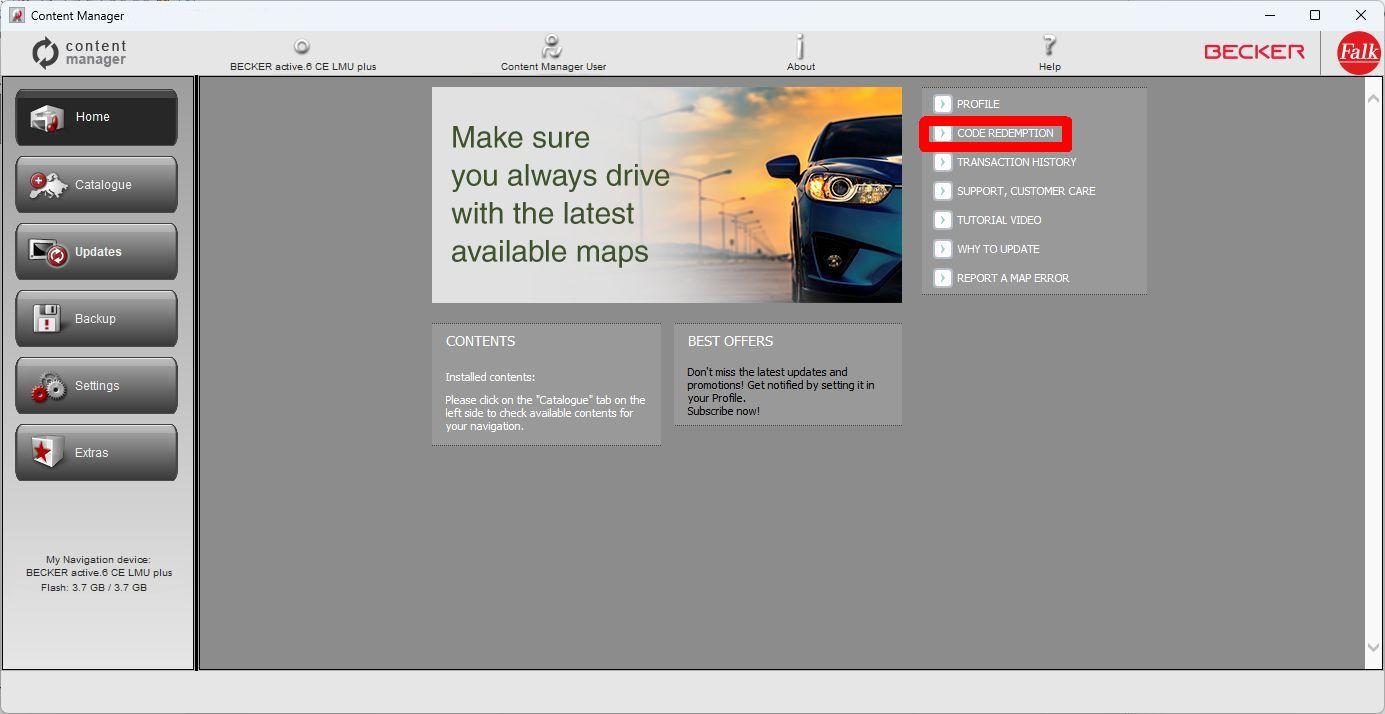
- Enter the purchased prepaid code into the code field, then click the REDEEM button.
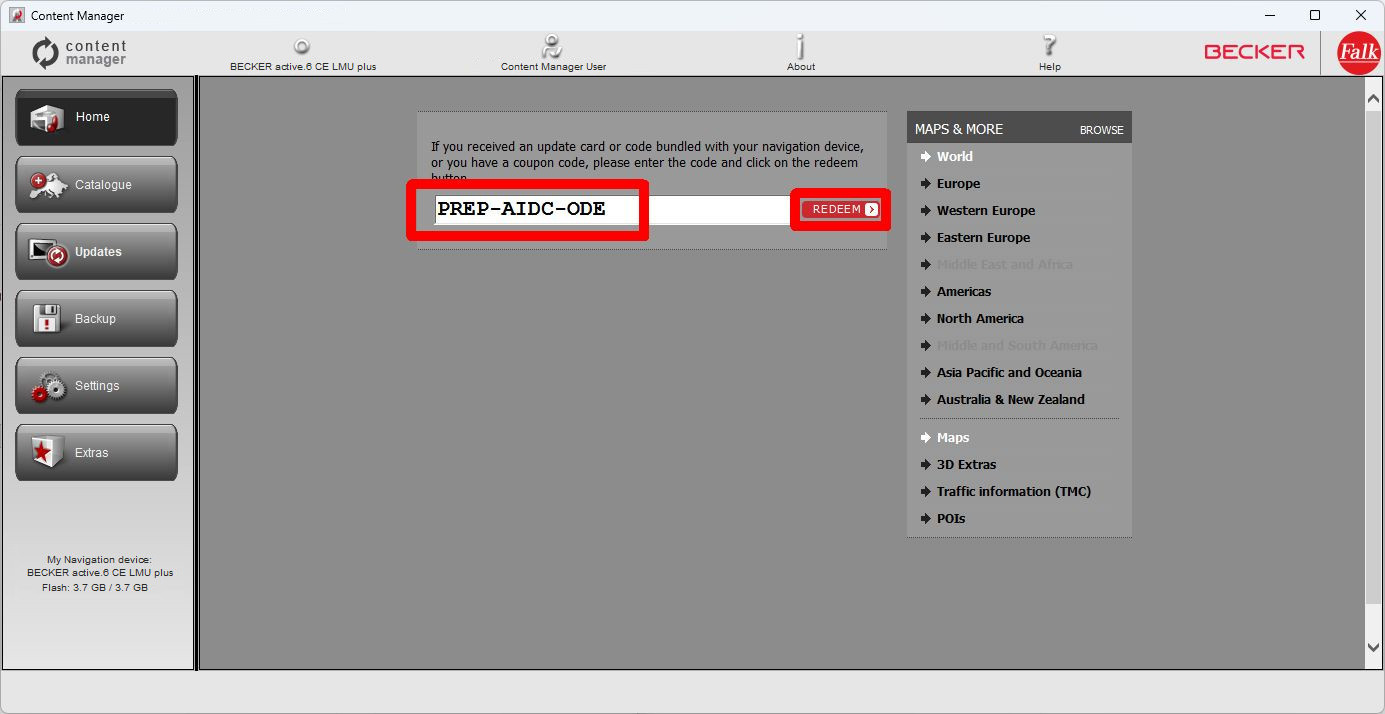
- After the code is accepted, click the CHOOSE button next to the offered map package.
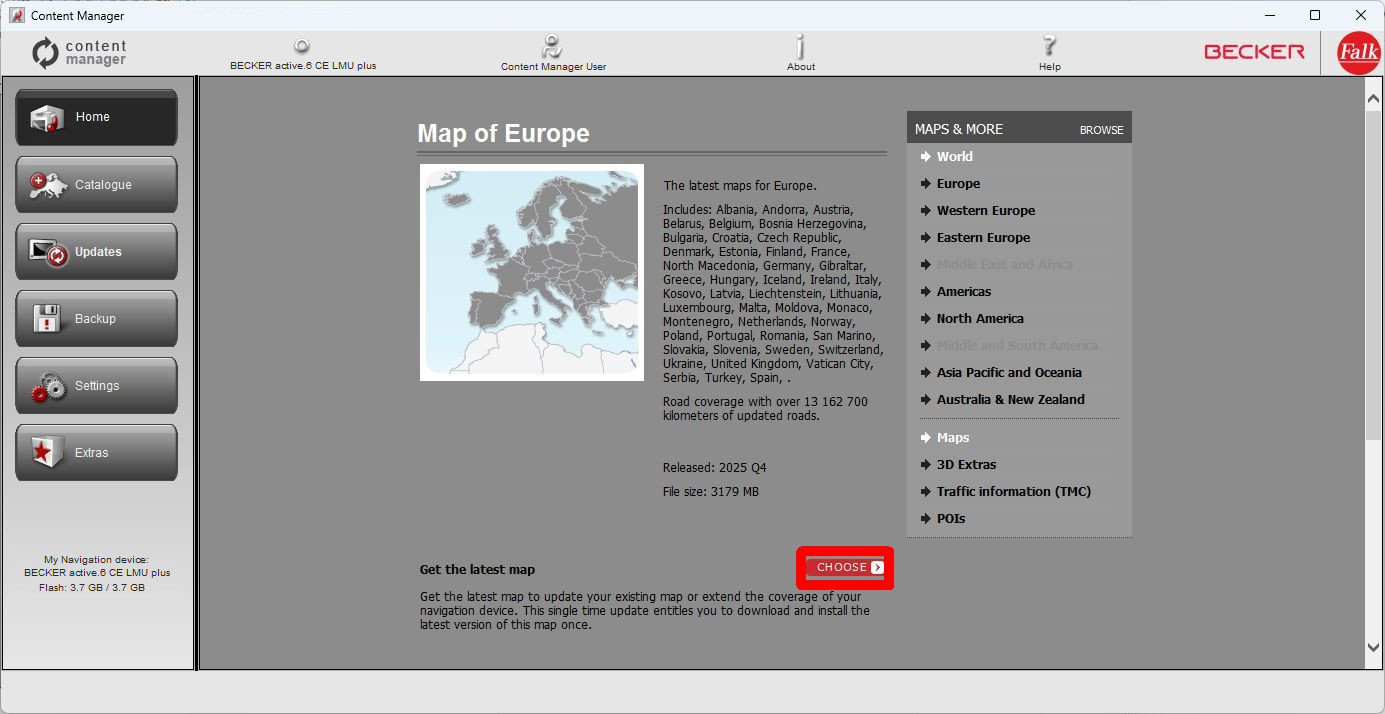
- The new content will appear in the list of installable contents.
After successfully connecting your Becker PND and logging in, you can start browsing updates and extra maps in Content Manager.
Click on Catalogue button in the menu bar on the left-hand side.
Available updates and extras can be filtered by geographic region or content type (map, 3D package, etc.).
You can find out more details about the updates by clicking on READ MORE.
After you have purchased an update, it is added to the installation queue.
Click the Updates button to continue with the download and installation of updates.
You can start buying by clicking on the Catalogue. After that choose the item you like and clicking on shopping cart icon on detailing page of the selected item.
If you would like to buy additional updates too, simply select CONTINUE BROWSING and click on READ MORE for another item, then click the Add to cart button to add the next item to your cart.

When all items are in the cart, click on the Checkout button and go through the checkout process.
After adding the item to the cart, you will see your cart with a button to start the checkout process.
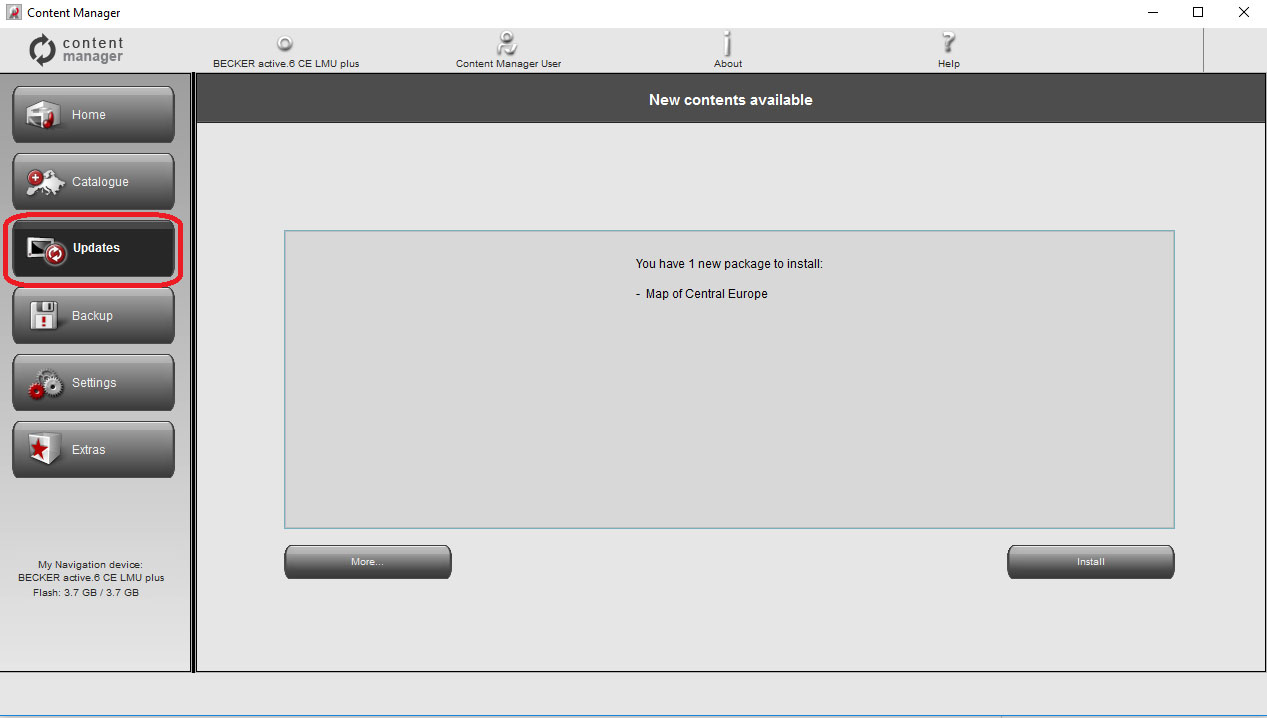
If you purchased update(s) to the installation queue, please click on the Updates button in the menu bar on the left side.
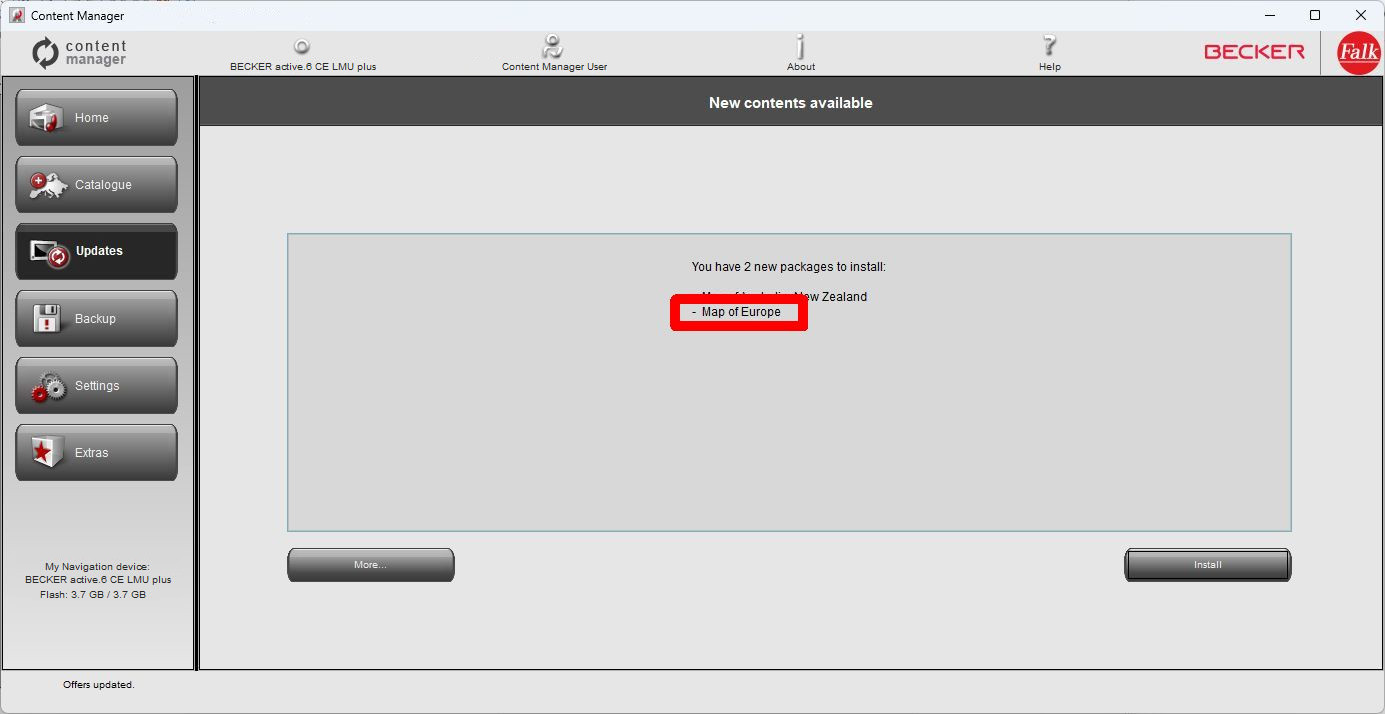
The Updates screen shows you the list of:
- purchased items (updates or extras),
- extras added to the installation queue from the Catalogue screen
7.1 - Simple installation
By default, all items belonging to all regions are selected for installation.
If you would like to install all items, click Install to start the installation process.
If you decide to skip a region for now, Click in More... and proceed to 5.2.) Advanced options
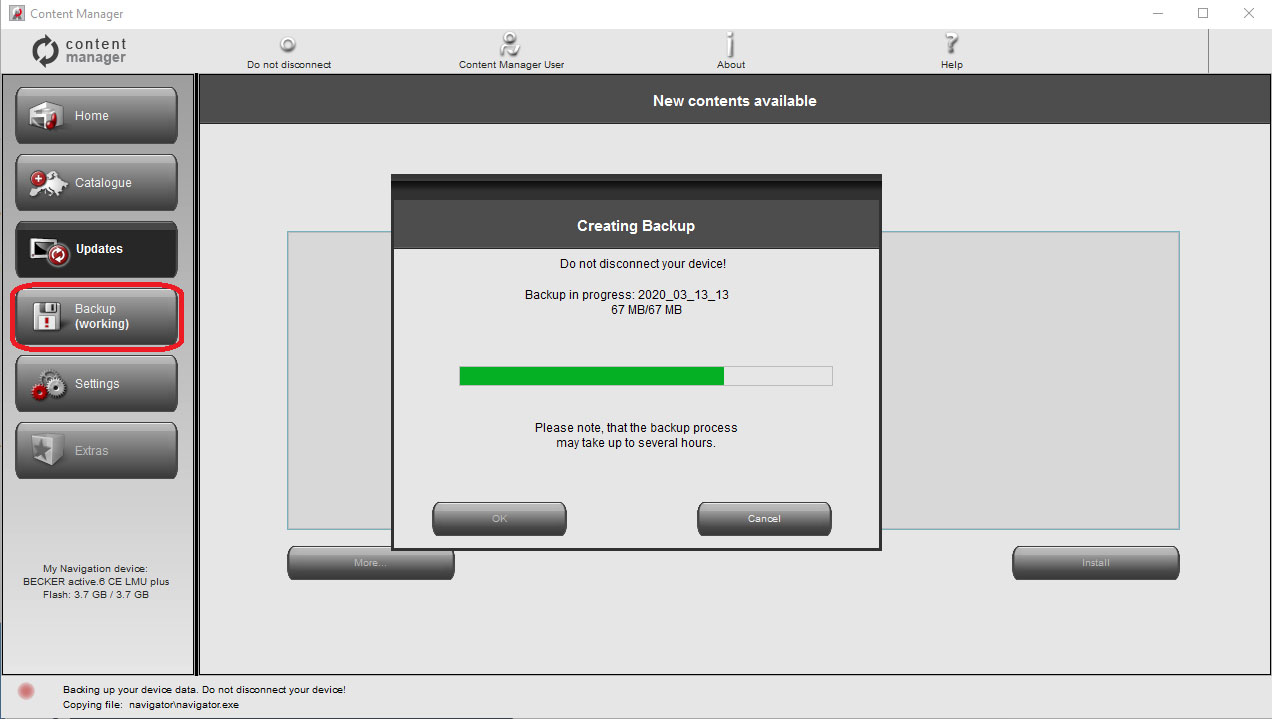
After clicking Install, you will be prompted to create a device backup. We strongly recommend creating a backup before downloading and installing updates. You can skip creating a backup at your own risk.
Depending on your PC's USB port and device capabilities (support for USB 1.1 or USB 2.0) the time needed to make a backup may vary. Please wait until the backup process is completed.
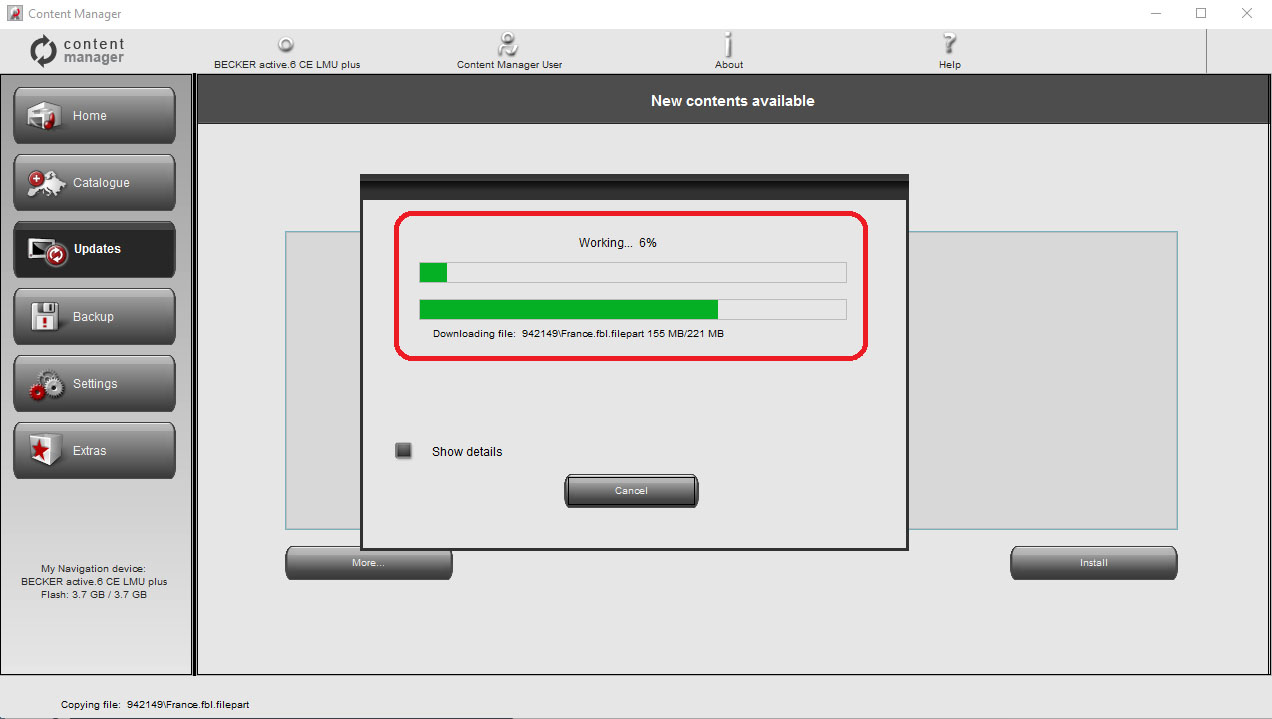
After creating a backup, Content Manager will start downloading and installing the selected updates. A double status bar shows you the progress. Please wait until you receive a message that the operation is completed.
7.2 - Advanced options
You have several options to review the available updates in detail:
- You can check the exact list of available content belonging to a region by clicking the (i) icon in a table row. This merely provides information, you cannot modify the selection here.
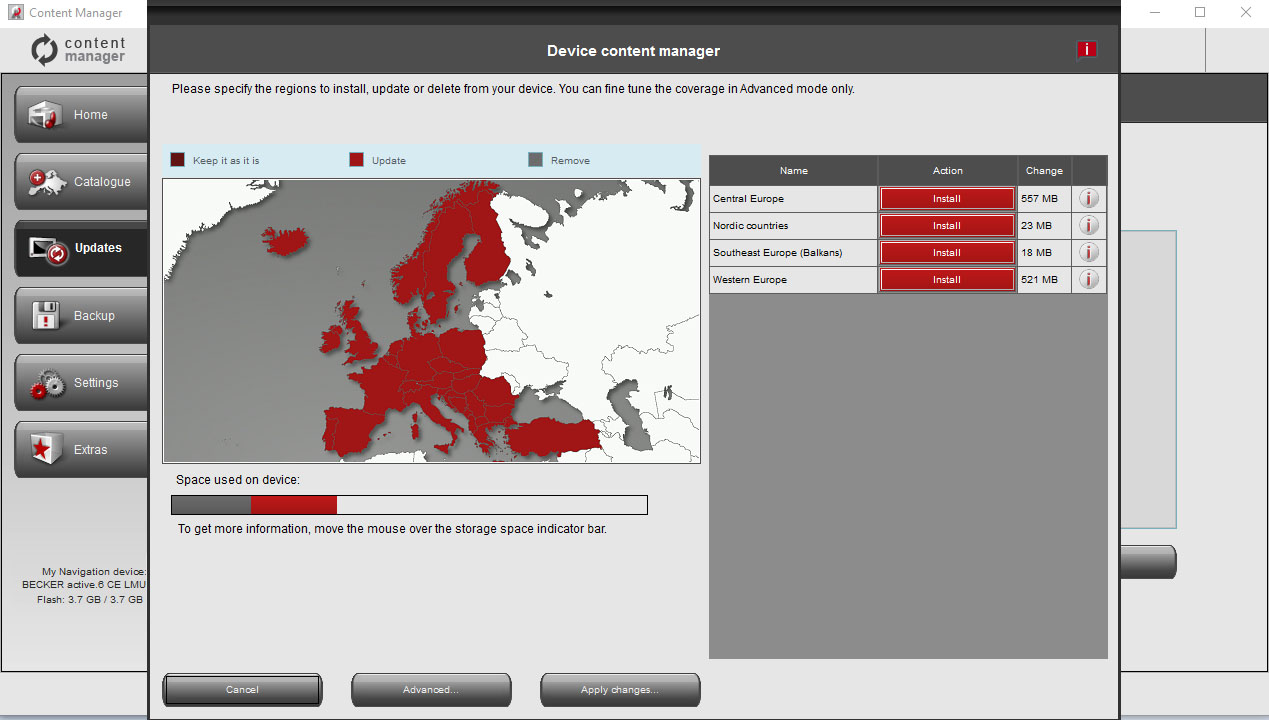
Here you can review the selected updates together with the content that you already have on your device. Clicking on a region on the map will have the same effect as clicking a button in the Action column of the table:
- In case of a region for which updates are available, you can choose whether you want to Upgrade the region, keep the current content or remove all content belonging to that region entirely.
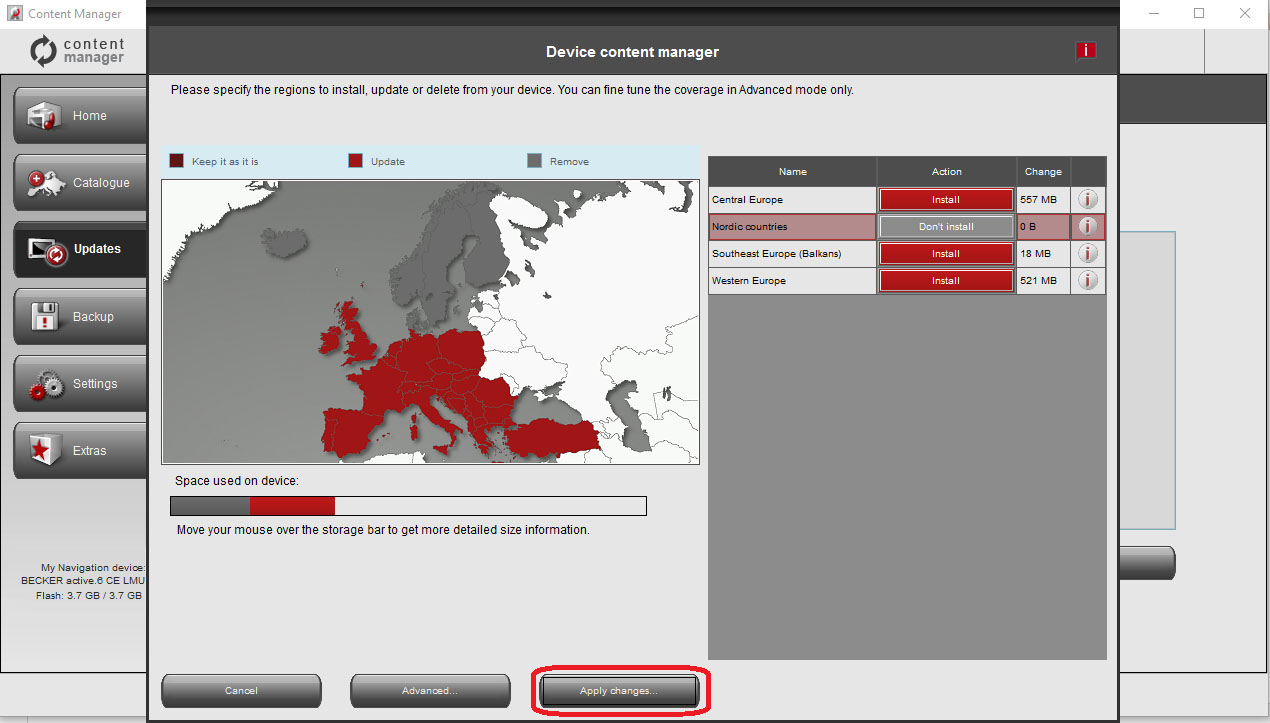
- In case of regions without updates, you can keep it as it is or remove all content belonging to that region entirely.
- Click Apply changes... to start installing the selected updates and performing all selected actions. The installation process is then the same as in the case of simple installation.
- To make sure you avoid loss of data, please create a backup with Content Manager before performing removal and installation.
You can click Advanced in the Device maintenance window to enter the Advanced install wizard.
Here you can review all the selected updates together with the content that you already have on your device item by item.
- You can sort content items by region, country or content type (such as maps, 3D landmarks, places of interest, and so on). Click any of the option buttons at the top of the table to change the sorting criteria.
- You can upgrade, keep or remove content items just like in the Basic install wizard. However, here you can make a choice individually for each content item, not just by region. Click the buttons in the After column (or in the title row for a group of content items) to modify the action related to a content item.
- Please do not remove pre-installed content as this may harm your device. (You can see this under the red bar of the update).
- You can check the size of each content item, and in case of updates, you can see the change in size compared to the currently installed version of that content. At the bottom of the table, you can review the total change in the space occupied by all content after making the changes that you selected in the table as well as the remaining free space on the device after completing all actions.
- Click Apply changes... to start installing the selected updates and performing all selected actions. The installation process is then the same as in the case of simple installation.
- Press the Backup button in the menu bar on the left-hand side and click on Create Backup.
- Enter the backup name and click the OK button.
- The Content Manager will automatically create the backup.
! Attention: Please do not disconnect your Becker PND during the process!